
Static Jekyll site with S3, CloudFront & CodePipeline
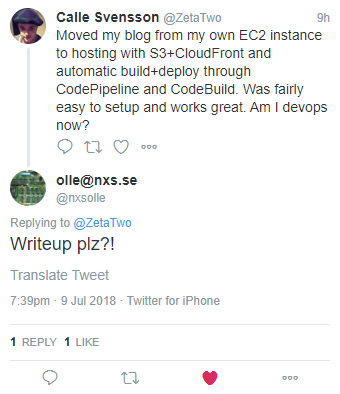
Through my day job I been exposed a lot to AWS. I really like AWS and I think they create some cool services. Until now I have hosted this website on my own server (AWS EC2) using a stack of Ubuntu, Apache and Jekyll. With alternative solutions than doing everything yourself being all the rage now I decided to get rid of managing the server and try to host my website on AWS S3 instead. Yesterday I went ahead and did this migration. It was fairly easy and I went ahead and tweeted about it to which I got this reply by my friend Olle.
I couldn’t deny such a request so here is a short write-up on how I set up my website to be served from S3 via CloudFront using CodeBuild and CodePipeline to automatically deploy new updates. The website is a static website generated with Jekyll consisting of your average mix of HMTL, CSS and images. The only Javascript used is Disqus and Google Analytics (which I guess most of you have blocked anyway). Jekyll is a Ruby based static website generator which transforms a bunch of Markdown files and HTML templates into a website which can be hosted with any regular web server. This write-up will be specifically my site and therefore have some Jekyll specific steps to it but most of it should be easily adaptable to any static website system.
The setup consists of the following components:
- AWS S3 - File hosting
- AWS CloudFront - CDN and HTTPS
- AWS Lambda - Path rewriting
- AWS CodeBuild - Build static site
- AWS CodePipeline - Trigger build on GitHub push
Let’s break this up into two parts: hosting the site and building the site.
Hosting the site
I will start with the actual hosting of the site. For this, we need to setup a AWS S3 bucket to hold the files. We then need to create a AWS CloudFront distribution and attach a HTTPS certificate to it. Finally, we need to add an AWS Lambda function to get pretty paths.
First, I went into AWS S3 and created a bucket called “www.zeta-two.com”. I left all other settings to default in the setup wizard. Note that AWS S3 has a feature to host a static website directly from it. However, this won’t do as you can’t use HTTPS with your own domain since there is no way to attach your own certificate to AWS S3. Instead we have to create a AWS CloudFront distribution in front of the bucket which will handle HTTPS with the correct certificate. We also get things like geographically distributed servers (gotta go fast) and some other nice stuff for free when doing this. Before setting up the AWS CloudFront distribution we need to get a certificate. AWS has a service similar to Let’s Encrypt where you can get certificates for domains you own. I went into AWS Certificate Manager and made sure to change the region to “us-east-1”. This is important since CloudFront can only use certificates from this region. I requested a certificate for “zeta-two.com” and added “www.zeta-two.com” as an additional domain name to the certificate. Following the guide and validating through DNS records that I in fact control the domain “zeta-two.com”, I had a valid certificate. I then went into AWS CloudFront and created a distribution. Here, I set up the distribution with the following settings:
Origin Domain Name: “www.zeta-two.com.s3.amazonaws.com” (the name of my AWS S3 bucket)
Origin Path: “” (blank)
Restrict Bucket Access: Yes (only access through CloudFront)
Origin Access Identity: Use an Existing Identity (you might have to create a new)
Your Identities: “Default”
Grant Read Permissions on Bucket: “Yes, Update Bucket Policy”
Viewer Protocol Policy: “Redirect HTTP to HTTPS” (We only want HTTPS traffic)
Alternate Domain Names (CNAMEs): “zeta-two.com, www.zeta-two.com”
SSL Certificate: Custom SSL Certificate, “zeta-two.com (xxxxxxxx-xxxx-xxxx-xxxx-xxxxxxxxxxxx)”
Default Root Object: “index.html”
All other settings were left to default. While waiting for the CloudFront setup to finish which takes a while, I went ahead and set up DNS records. If you use AWS Route 53 as your DNS provider you can just set your domain as an alias to your CloudFront resource. Personally, I use Cloudflare which fortunately supports apex level CNAME records. I use this to setup these two records:
zeta-two.com CNAME xxxxxxxxxxxxxx.cloudfront.net (the name of the newly created distribution)
www.zeta-two.com CNAME zeta-two.com
That is pretty much it for the hosting part. After all settings have propagated fully, any files put in the AWS S3 bucket will be accessible through https://zeta-two.com
There is one minor issue though. While CloudFront will treat the URL “https://zeta-two.com” as referring to the file “s3://www.zeta-two.com/index.html” thanks to the “Default Root Object” setting of the distribution, this is not true for subdirectories. For example “https://zeta-two.com/about” will lead to a HTTP 404 error and not serve the file “s3://www.zeta-two.com/about/index.html”. Here I could of course just change the link structure of my site but I like my pretty URLs. The solution is to use AWS Lambda@Edge which let’s us rewrite a request (or response) using a AWS Lambda function.
I pretty much implemented this article about default directory indexes from the AWS blog. For this I went into AWS Lambda and again chose the “us-east-1” region since this is the only CloudFront can use. Here I created a blank Lambda function with the following settings:
Create Function: “Author from scratch”
Name: “CloudFrontIndex”
Runtime: “Node.js 6.10”
Role: “Create a custom role”
I created a role called “CloudFrontIndex” and gave it the following policy:
{
    "Version": "2012-10-17",
    "Statement": [
        {
            "Effect": "Allow",
            "Action": [
                "logs:CreateLogGroup",
                "logs:CreateLogStream",
                "logs:PutLogEvents"
            ],
            "Resource": [
                "arn:aws:logs:*:*:*"
            ]
        }
    ]
}
This is just a basic role required to execute AWS Lambda functions. I then added the following code to the function and saved it noting its full ARN: “arn:aws:lambda:us-east-1:xxxxxxxxxxxx:function:CloudFrontIndex”.
'use strict';
exports.handler = (event, context, callback) => {
    // Extract the request from the CloudFront event that is sent to Lambda@Edge
    var request = event.Records[0].cf.request;

    // Extract the URI from the request
    var olduri = request.uri;

    // Match any '/' that occurs at the end of a URI. Replace it with a default index
    var newuri = olduri
    if (!newuri.endsWith('/') && !newuri.split("/").slice(-1).pop().includes('.')) { newuri += '/'; }
    newuri = newuri.replace(/\/$/, '\/index.html');

    // Log the URI as received by CloudFront and the new URI to be used to fetch from origin
    console.log("Old URI: " + olduri);
    console.log("New URI: " + newuri);

    // Replace the received URI with the URI that includes the index page
    request.uri = newuri;

    // Return to CloudFront
    return callback(null, request);
};
Now I went back to CloudFront, clocked my distribution and went to the “Behaviours” tab. Here I chose to edit the single entry and at the bottom I added the reference to the lambda:
Event Type: “Origin Request”
Lambda Function ARN: “arn:aws:lambda:us-east-1:xxxxxxxxxxxx:function:CloudFrontIndex:4”
Note the version number at the end of the ARN. AWS Lamba allows you to save revisions of the function but for CloudFront you need to specify a specific revision. I made some mistakes to I use revision 4. Saving this and waiting for a while finally gives us the setup we wanted:
- Static file hosting
- HTTPS with valid certificate
- Custom domain
- Pretty URL:s
This means that if we were fine with manually uploading new versions of the site to AWS S3, we would be done now but we’re not! Let’s look at how I set up the build pipeline.
Building the site
I use GitHub to host a Git repository of my site at https://github.com/ZetaTwo/zetatwocom. The plan was to set it up so that whenever I pushed to the master branch of this repository, AWS would pull, build and deploy my site. To build the site, I used AWS CodeBuild. CodeBuild uses a build specification file called buildspec.yml in the root of the repository to define the various build actions. I based my work on this blog post by Alex Bilbie on using AWS CodePipeline and CodeBuild with Jekyll.
I created a build specification with the following contents:
version: 0.1

phases:
  install:
    commands:
      - gem install bundler
      - curl -sL https://deb.nodesource.com/setup_10.x | sudo -E bash -
      - apt-get install nodejs
      - bundle install
  build:
    commands:
      - bundle exec jekyll build
      - aws s3 sync --delete _site/ s3://www.zeta-two.com
I separated the build into two phases: “install” and “build”. Since I will be using the Ruby base image from AWS CodeBuild, I don’t need to install Ruby. However, I need something to execute Javascript as well due to the CoffeeScript transpiler of Jekyll requiring it. I don’t really use CoffeeScript at all so I should probably get rid of it altogether but this was easier at the moment. I also use Bundler to install all gems required by my site. In the build step, I instruct Jekyll to build the site and then use the AWS command line client to sync it to the AWS S3 bucket. Note that I don’t use the build artifacts functionality of CodeBuild since that is a bit messy with how the paths work.
I then created a CodeBuild project with the follwing settings:
Project name: “www_zetatwo_com”
Source provider: “GitHub”
Repository: “Use a repository from my account”
Repository URL: “”
Webhook: “No”
Environment Image: “Use an image managed by AWS CodeBuild”
Operating system: “Ubuntu”
Runtime: “Ruby”
Runtime version: “aws/codebuild/ruby:2.5.1”
Artifacts Type: “No artifacts”
Cace Type: “No cache”
Service role: “Create a service role in your account”
VPC: “No VPC”
I then went into AWS IAM and created a role called “codebuild-www_zeta-two_com-service” with the following policy which is just the default service role policy for CodeBuild:
{
    "Version": "2012-10-17",
    "Statement": [
        {
            "Effect": "Allow",
            "Resource": [
                "arn:aws:logs:eu-west-1:xxxxxxxxxxxx:log-group:/aws/codebuild/www_zeta-two_com",
                "arn:aws:logs:eu-west-1:xxxxxxxxxxxx:log-group:/aws/codebuild/www_zeta-two_com:*"
            ],
            "Action": [
                "logs:CreateLogGroup",
                "logs:CreateLogStream",
                "logs:PutLogEvents"
            ]
        },
        {
            "Effect": "Allow",
            "Resource": [
                "arn:aws:s3:::codepipeline-eu-west-1-*"
            ],
            "Action": [
                "s3:PutObject",
                "s3:GetObject",
                "s3:GetObjectVersion"
            ]
        }
    ]
}
We also need to allow CodeBuild to edit the contents of the AWS S3 bucket. To do this, I went to AWS S3 and modified the “Bucket Policy” of the website bucket to the following:
{
    "Version": "2008-10-17",
    "Id": "PolicyForCloudFrontPrivateContent",
    "Statement": [
        {
            "Sid": "1",
            "Effect": "Allow",
            "Principal": {
                "AWS": "arn:aws:iam::cloudfront:user/CloudFront Origin Access Identity XXXXXXXXXXXXX"
            },
            "Action": "s3:GetObject",
            "Resource": "arn:aws:s3:::www.zeta-two.com/*"
        },
        {
            "Sid": "1",
            "Effect": "Allow",
            "Principal": {
                "AWS": "arn:aws:iam::xxxxxxxxxxxx:role/service-role/codebuild-www_zeta-two_com-service"
            },
            "Action": [
                "s3:PutObject",
                "s3:DeleteObject"
            ],
            "Resource": "arn:aws:s3:::www.zeta-two.com/*"
        },
        {
            "Sid": "1",
            "Effect": "Allow",
            "Principal": {
                "AWS": "arn:aws:iam::xxxxxxxxxxxx:role/service-role/codebuild-www_zeta-two_com-service"
            },
            "Action": "s3:ListBucket",
            "Resource": "arn:aws:s3:::www.zeta-two.com"
        }
    ]
}
The first statement was added by CloudFront and the two other were added by me to allow access to AWS S3 from CodeBuild.
Now we are just missing one final domino in this Rube Goldberg machine: triggering the build from GitHub. To do this, I created a new project in CodePipeline with the following settings:
Pipeline name: “www_zeta-two_com”
Source provider: “GitHub”
Repository: “ZetaTwo/zetatwocom”
Branch: “master”
Build provider: “AWS CodeBuild”
“Select an existing build project”
Project name: “www_zeta-two_com”
Deployment provider: “No Deployment”
Role name: “AWS-CodePipeline-Service”
Finally saving this puts all the pieces in place. After making a commit and pushing to the master branch, a new version of the website is successfully deployed.
Conclusion
Setting up AWS S3, CloudFront, Lambda@Edge, CodeBuild and CodePipeline takes a few steps but they are all fairly logical and makes sense once you are used to the AWS way of things. There are some improvements that can be done to my workflow. Instead of having to install “NodeJS” on every build I could either create my own Docker build image for this or, in this specific case, just get rid of NodeJS as a dependency altogether. I could also separate the “build” and “deploy” steps of my flow to make it more semantically correct. It’s not a big deal however since the whole thing runs in under 3 minutes any way and I don’t publish that many blog posts. So, there Olle, and everyone else, is your write-up. Hope you enjoyed it and please leave a comment if you have questions or feedback.